
There is an old saying, “You can pay me now…or pay me later,” which rings true when it comes to Holter scanning. Anyone who has ever scanned on a Holter system that only offers Retrospective scanning understands this concept. In a Retrospective Scanning Holter system, the Holter algorithm classifies every beat and event without any approval. After the software has run through every beat, it puts the beats into Classes or Bins. Then, you have to go through those Bins and determine what belongs and what does not.
On some systems, this can be a very laborious and time-consuming process because the software makes you individually deal with each wrongly classified beat or event. Imagine the work it will take to sort through 10,000 wrongly classified Ventricular beats?
Speed Up Your Scanning
Prospective scanning in Zymed’s Page or Superimposition mode is very valuable because it allows you to check that events are called correctly while you are scanning (See Four Tips to Speed Up Your Scanning).
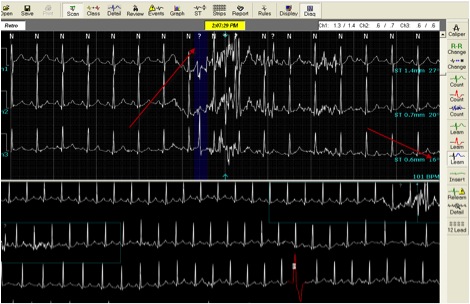
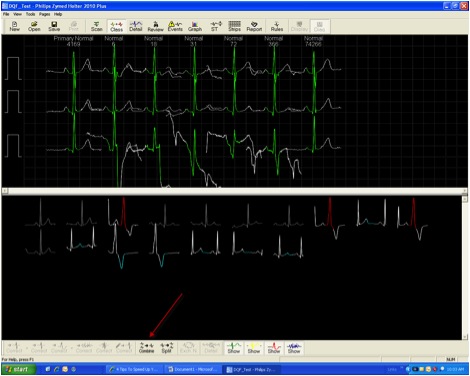
Let’s say you have a RUSH Holter scan or are running out of time. What can you do? Start by scanning the first hour or two of the Holter study in Page or Superimposition mode and use the “Learn” feature to teach the software if it is mislabeling any beats (See Arrows below).
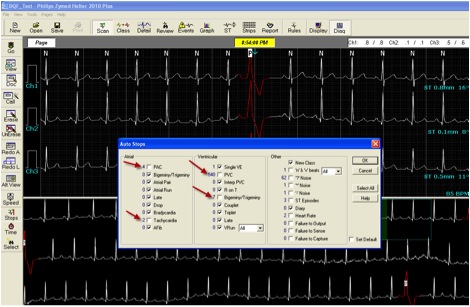
Next, capture representative beats as strips for each type of Event and then turn off the Auto Stops for the Events that you see Zymed is calling correctly.

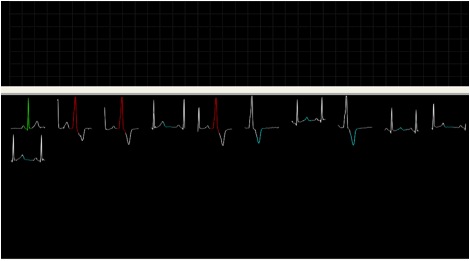
After the Zymed Holter system completes the scan, click on “Class.”
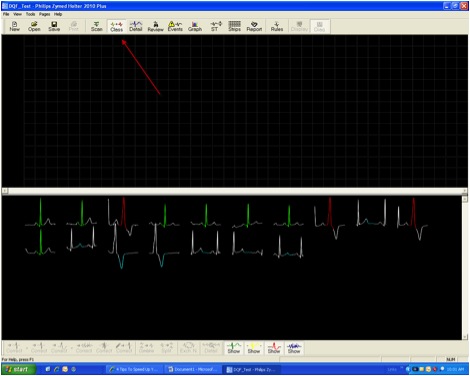
Then, click on each of the Green beats listed to bring them up to the top of the screen.
Next, click “Combine” to combine all of the normal beats into one Class.
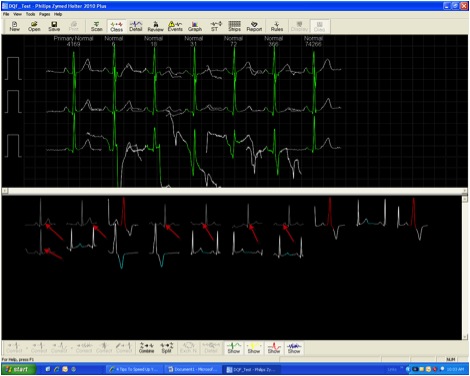
You have now combined all of the Normal beats into one Class. Click “Split” if you made a mistake and want to separate them again.
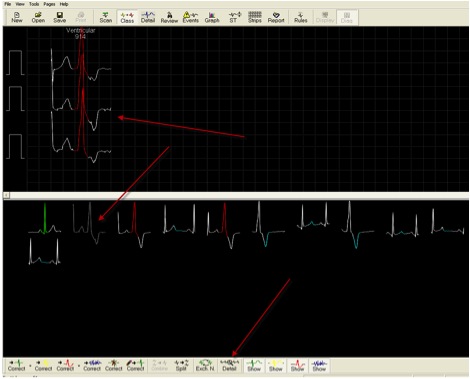
Now, click on the largest Class of Ventricular beats (Red Beats) to bring them to the top screen. Then click the “Detail” button.
Click on the “Alt View” button in the lower left corner of the screen. You can now look at and scroll through 60 beats from the same Class at a time by clicking just below the scroll bar on the right side of the screen.
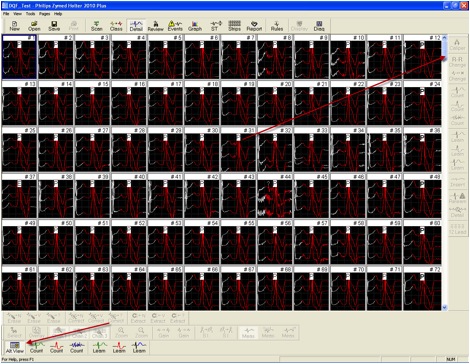
You can then use your mouse to click on a single beat or hold down the Ctrl Key and click on multiple beats and then either “Count” or “Learn” them as a different Class. “Learn” will change every other beat in the entire study that matches that waveform for you automatically. Pressing the “Diagnostic” button will allow you to see the chosen beat in greater detail in the top part of the screen.

Don’t get bogged down, or lose valuable time in the editing process. Because of the Learn feature as well as the ability to click on multiple beats at one time, group editing and Learning of Classes rapidly speeds up the editing process, even if you have chosen to scan in Retrospective mode.